Monday, March 11, 2019

Living the Dream


 I'm thrilled to be back on the Scrapmatts blog today sharing some recent layouts I pulled together using the clever chipboard and stencil designs that Sophie and Andrew have come up with ... I'm constantly impressed with the scope of possibilities I can use these embellishments for! 

In the following pages I use the positive and negative shapes in a net template, a gorgeous set of chains to build titles onto and the cutest little splatter stencil to add fantastic interest to the layouts...


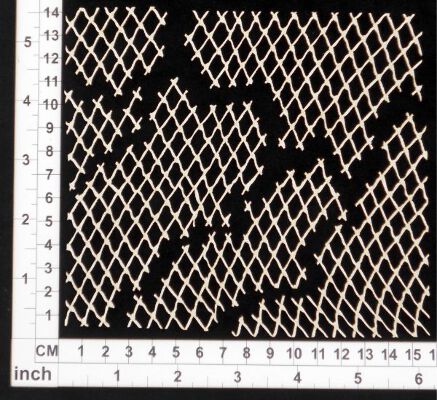
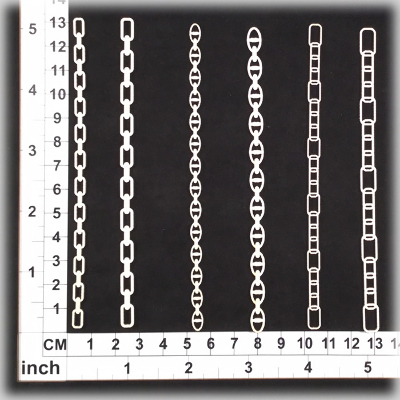
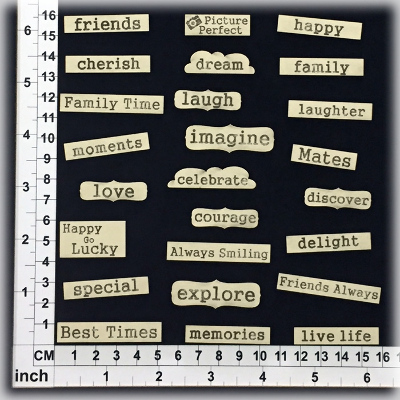
The Net chipboard is too easy to use, just cut and paste and it looks perfect on any beachy themed layout ... and how fantastic are these gorgeous set of chains... I'm LOVING using these! Here I've used them to build up a hanging set of title words 💚


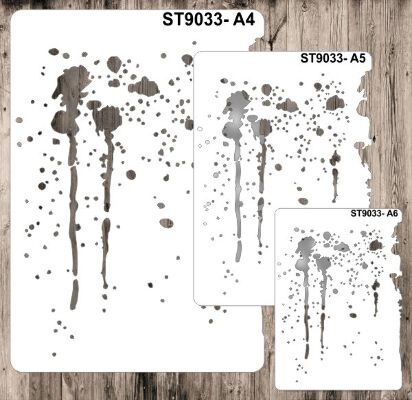
Theres literally so much in one pack of chipboard 'netting' I managed a second layout out of that embellishment pack... and more hanging chain and titles. The splatter template earned its self a home in my heart forever with this layout... It was so easy to use and looks so good I've decided to give that template the 
'Best $4 I ever spent' 
Award!!


And here we are on the third layout ... you guessed it, I'm still using the same set of chipboards and splatter stencil ... 
these embellishments REALLY stretch!! 
The only different here is that I've used the negative bits from the net chipboard packet .... I Cannot thank Scrapmatts enough for not letting those precious little scraps fall on the floor during production, because I find those edgy little diamonds really funky!


AND...


At the end of all of that, I still had stuff left so I decided I could squeeze a card out as well... this time a diamond template in the background helped bring in the extra colour I was after. 

So this weeks hot tip is: go grab yourself a splatter template and some netting and chain chipboards... you will be amazed how far they take you 💚


Friday, March 8, 2019

March Creations with Tania

 Hello there!

Tania joining you today to share some projects I created for this month using lots of gorgeous Scrapmatts goodies! 

First up this month I have a layout.....

"Enjoy"


I mounted my background paper on white cardstock and then set about adding some texture using the New Cheese Stencil.  Once I was happy with the coverage I added a bit of colour using Kaiser and Lindy's Stamp Gang Mists.  Once dry I added a photo which I raised as I wanted to add in all the gorgeous fussy cut and die cut flowers, I tucked them under and overlapped them over the photo.  I then tucked in the string circles and some of the leaf sprays.  

Some close ups......


My second share for this month is a card......

"Happy Birthday"


Once I had chosen my patterned papers for the card and distressed all the edges I added them to the card front.  I added the smaller rose circle from the string circles roses pack which I left raw, and a couple of singular roses to the front of the card.  I embellished the card with some beautiful Prima and 49 & Market flowers.  I tucked in some netting trim around the card and finished off with a Happy Birthday title from one of the Scrap Words packs.

Here's some close ups........


Well that's all from me today!  I hope I have inspired you all a little.  Don't forget to check out the store here for all your Scrapmatts goodies, and also pop back to the blog to see the gorgeous creations from the other DT girls.

 Until next time, happy crafting Tania xx

Tuesday, March 5, 2019

Dream Day layout & Gift Tags by Kim


Hello...hello, Kim here to share some of my latest creations with you!
Today I am going to share a wedding layout and 2 gift tags.

My beautiful daughter, Samantha was married last November & I have scrapped one of my favourite photo's from her special day....mind you I have a lot of favourite photo's from that day!

Let me show you my layout.....

{Dream Day}
 I have used the stunning Dreamcatcher chipboard to embellish my layout.

http://papertoleaustralia.com/cb5186-dreamcatcher-01

It went perfectly with the softness of my layout.


 Next I would like to share two Gift Tags I have put together.


 I love the country feel of these Tags.
I have used the gorgeous Wildflowers collection below

 
{Tag One}
 For Tag One I also used 
(If you click on the photo's below it should take you directly to the Scrapmatts online shop.)


http://papertoleaustralia.com/cb1218-scrap-words-19   


With Tag One I found the word 'MAKING' on another sentiment, so I just cut it out and stuck it on my project. I did try other things, like stamping it on a scrap of paper but I just didn't like the look of it!

 {Tag Two}

I used the 'Smile' sentiment from the pack below.
 
 http://papertoleaustralia.com/cb6117-assorted-words-30


http://papertoleaustralia.com/cb4072-wildflowers-01  


 To create this effect I carefully bent some cardboard, added my stitched section & then stuck down my sentiment. Once dry I then stuck it on my tag.


Well thank you so very much for stopping by today!
I do hope you have enjoyed looking at my creations and I hope you are inspired to get creating???

Maybe you have some wedding photo's you might like to scrap?
Or maybe you want to create some gift tags/cards for some up and coming birthdays or special events???
Check out the 

And make sure you pop back here in another couple of days to see what the other Design Team Members have been creating!

Until next time

Happy Crafting

Kim Ewins  


Saturday, March 2, 2019

Mixed Media Shadow Box - Crece T

Hello everyone, Crece T herewith you today and Welcome the start of March. Today I'm sharing with you 2 projects, a Shadow box and a layout.


Mixed Media Shadow Box
 
 
Hard to think that this plain shadow box went from this....
 
To This....


First I started with Gluing down the 'Stones' from the soon to be Available Corrugated Shapes.
I then used the chipboard Tree, Gum Leaf cluster and Kangaroos from CB5149 Australia 01 and glued them to the shadow box.


I then Painted all over the chipboard pieces and 'Stones' with Black Gesso.
While that was drying I put the rest of the shadow box together and painted the 2nd layer of the front of the shadow box gold, to show contrast for later.
 
I carefully attached the photo of my Son Andy feeding a Kangaroo to the base of the shadow box, then glued down the 2nd layer of the shadow box (gold painted one)
 
I then placed the Top layer that I covered with Black Gesso using some strong glue.
To colour I used some earthy coloured waxes and gently rubbed the colour over the chipboard pieces. I love this effect as it really makes the chipboard pop.


To Finish it off I placed the oval shaped title "A Wonderful Day" from CB1242 Scrapwords 28
to the top of the shadow box.


HOHOHO
 
 This was a quick little layout I created using Stencil 9061 Stars A6 to create a simple background.
I stared by brushing some lime green paint onto some cardstock and then using some modelling paste and the stencil I got a lovely starry background.
 
To keep with the 'Star theme' I then painted with gold CB5138 String Circles 02 and placed that to the bottom right of the photo/paper cluster.
I felt it needed some MORE stars...so I used some stars from CB1249 Stars 04, I also painted them Gold to keep the flow going.


To finish the layout off I used the words, Christmas, Memories & Together


Thanks for stopping by and having a look, remember to keep checking the Scrapmatts online store for new items and follow on Facebook too. The rest of the Design team have some amazing projects coming up this month so stay tuned...