
Thanks for joining me for another action packed Scrapmatts post!
As much as being at home during this time of social distancing has been somewhat of an emotional struggle, it has also been a really nice breather from the usual pace of life and I've been loving spending long hours playing with all my craft supplies.... here's what I've been up to:
Beach Babe Layout

HEADS UP: If you click on any of the product pictures in this post you will be taken straight to them in the Scrapmatts website 👍

No secret at all that I just adore these string circles and pull them out to use on at least 1 in every 5 layouts! lol 🤣 For this layout I've used the medium and smaller ones to support space for my 'journalling' and then I cut the large one in half to use as coordinating bubbles moving off the top and bottom of the page.

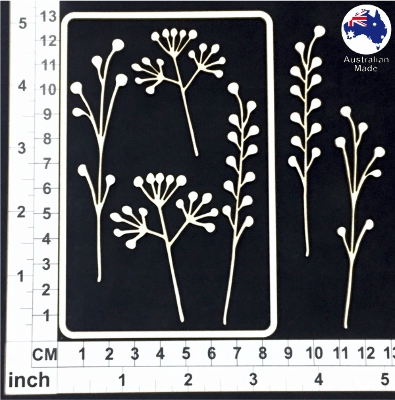
To compliment the 'seaweed' theme I was going for I used these fabulous floral sprays as I figured they would blend well with the patterned paper I had made and added to the layout.
My No. 1 hint for using chipboards is: Don't be afraid to adapt them to suit your needs - given the right tie in with other elements on the page, these floral sprays are totally passable as kelp!
 .
.  .
.
... and here is how I created the seaweed and other elements I used on this layout.

I started with a sheet of thick cardstock and a few distress inks. I used a water spray bottle, an ink blender and a straw to move the ink around the page, and I topped it all off with some shimmer spray.

After letting the page dry I roughly went over the groovy crazy lines with a sharpie pen, drawing attention to that seaweed look.

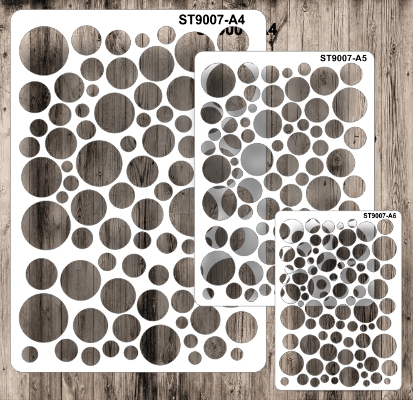
Next I dug out my trusty silver 'Inka Gold' wax and smeared it randomly over the page through this awesome A6 circles template.
After letting it all dry and touching up segments with a white pen, I cut off the half of the page I liked best and inked the edges to give the panel a finished look. Then I fussy cut a cool bit on the left over paper and used the remainder of the sheet to cut out the circles I used for the journaling panels.
😁 waste not want not!

Then I just arranged them all on a background sheet and added the photo and mat.
Too easy and LOADS of fun!
xo
Bloom and Grow Layout

For this layout I got a hold of a sheet of the Kaisercraft 'With Love' paper, a paper pad and some collectables. Choosing colours for a layout is an interesting process... I almost always try to coordinate with the stand out colours in the photo/s I'm using on the page, but occasionally I go completely rogue and choose a colour that is barely visible in the layout to highlight.
In this layout I decided I wanted to draw attention to that silly pink colour my daughter has died her hair in this shot so I coordinated every element ( except the watering can) to match with that tone.
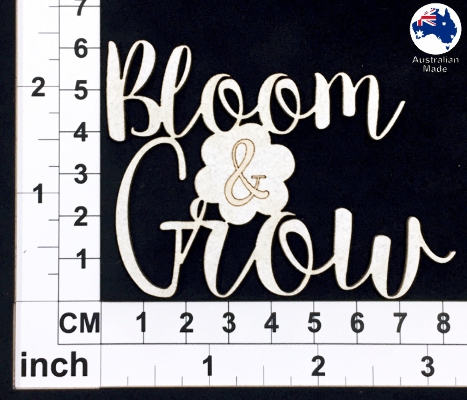
I coloured the chipboards with metallic markers and even managed to use one of the leftover chipboard supports to frame the title.

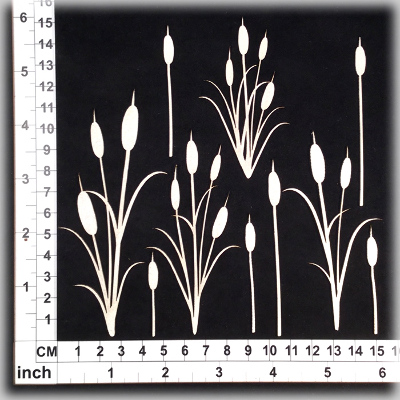
I also added in a few of these cute extra plant elements just to round to the look.
**( I always keep a stash of these kinds of plants/grasses chipboards on hand as they can often be added to layouts just to build them up or support other design elements).
I caved in when it came to the watering can and coloured it a similar blue to the jeans in the photo... seemed like a playful concession lol 😉
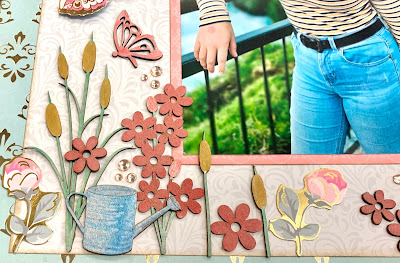
PLEASE NOTE: These chipboard flowers/water can/small butterflies are so new to the Scrapmatts range that they are not even up on the site yet, so if you would like try a set just drop Scrapmatts a message and let them know you are chasing CB6120 Card Elements Floral 002 👍
Flower Child Layout


There really isn't too much to this layout, the only really interesting thing I got up to was this tried and true back ground effect... first of all you stencil on the diamonds and then a fix pearls to the centre spaces (although I used my trusty old pearl pen this time around)
This creates a beautiful soft quilted look that I just adore - its a quick, easy and effective background technique that looks fabulous!
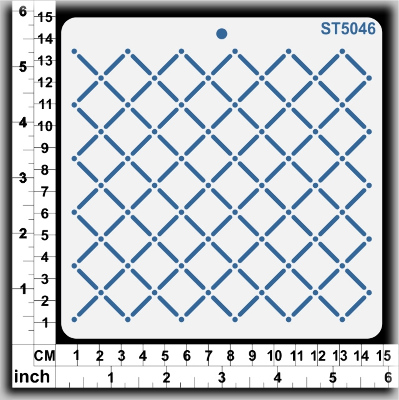
- I dropped small liquid pearls on the centre dots...


This FABULOUS border chipboard needed no assistance at all bar a light dusting of white ink.


And this chipboard title was super easy to separate and rearrange on the page to suit my layout.

One thing I did do to help balance the colours on this page was add add some Dusty Concord Distess Ink to the border and splatter it about a bit.

Then I had a heap of the mixed up ink left over and didn't want to waste it soooooo......

.... this card was just kind of born from that left over link! 🤣
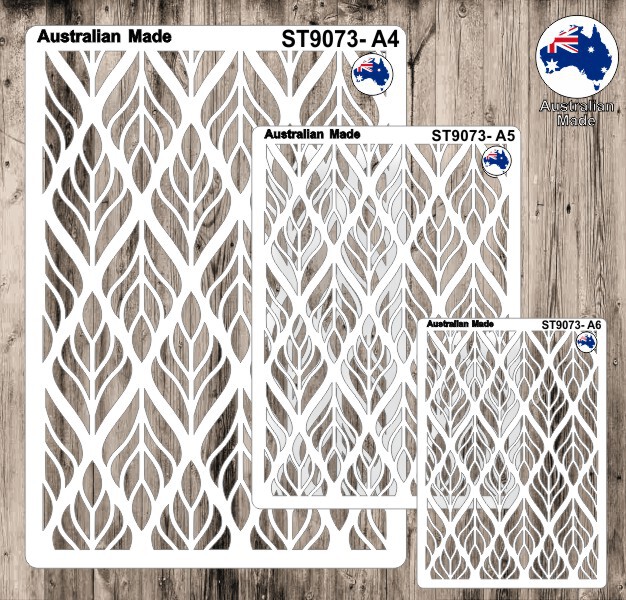
Firstly I made up a couple more colours of ink puddles (roughly half ink and half water) and then I just spread them over some watercolour paper using this A4 leaves stencil to create this gorgeous background.

 .
. 
I splattered a bit more yellow ink about the place,
and used a blending tool to pull out the white in the back ground.

Then I simply trimmed off the segment I liked best to use as my card background.
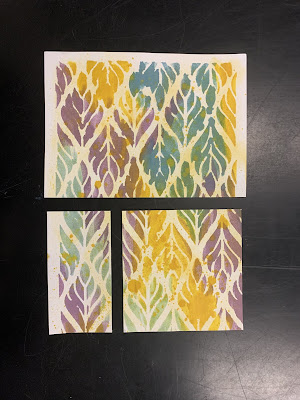
That small rectangle of paper left over kept looking at me from my desktop, just begging to be used... so eventually I made into a bookmark as a gift to send with the card 💜

And thats where I better end this epic post lol ... I hope you have manage to enjoy our extended 'at home' time as well.
Stay safe and take care xo
Cheers from Kel

I'm loving the green and blues you've been using lately x
ReplyDeleteThank you ... I'm very partial to that particular combination lol .
DeleteGreat layouts, your arty inspiration looks like a lot of fun on your pages.
ReplyDeleteGirls being older also allows for different challenges ❤
That is soooo true - I have a much broader scope for scrapping now that my photos are not just all full of little ones - just another one of the joys of watching them grow xo 💕
Deletewow wow wow beautiful creating.. so many gorgeous details and lovely photos too...
ReplyDeleteThanks Lizzy 🙏 ... it’s true - the eternal quest for fabulous photos never ends!! 😂
DeleteWow, you have been super busy, all stunning creations too xx
ReplyDeleteThanks Tania 🙏 the extra time isolation has a forced us has been bliss 💕
DeleteTotally gorgeous creations, Kelly-ann
ReplyDeleteLove them all!!!
Thanks heaps Kim 🙏
DeleteGreat projects Kelly-Ann. I love your little step by step too xxx
ReplyDeleteThanks Crece - I seldom remember to take photos as I go ... just lucky this time I guess 😂😂😂
ReplyDelete