Friday, October 29, 2021

Everything that glitters

Well I cannot help but notice that all over blogs and social media at the moment are beautiful Christmas collections and projects. How fast this time of year comes around! lol

So I took the hint and got cracking on my photos from last Christmas too...


Here on this layout I have used chipboard embellishments to create the title and some simple flourishes that really lift the whole page. I'm currently in love with the rough golf leaf application look so I dug out my metallic foil confetti jar and got working...


How awesome is this effect!!?

I used the words from this AMAZING chipboard set and have the rest aside for another page or two.


The process of getting the 'gold leaf foil' on there is simple but OH SO MESSY 😂
First I ink it with Gold ...


next I apply glue to where I want the foil to go, then it's just a matter of applying it bit by bit 
and tidying it all up at the end. 


I just adore this beaten metal look!


. 


This technique can also easily be applied to non Christmas layouts of course ... 
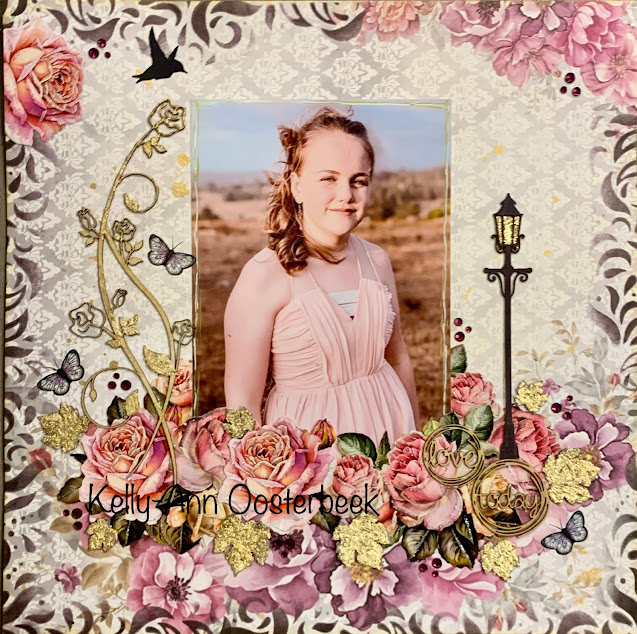

Here's a vintage feel layout with a bit of an edge it it where I've used the gold leaf foil on actual leaves and to highlight the other chipboard on the page as well.

But my favourite look on this page is the fabulous flourish border pulling in from the edges...


Its a very easy technique to do with the help of this gorgeous square stencil.

. 

This time with the leaves I did not add any ink first I just covered each one in glue and then 
layered the foil bits over them (dusting the excess edge bits away with a stiff paint brush).


Some of the extras like the circle words I used gold ink on...


And I made sure I backed he lamp post with some extra foil bits to give it a nice 'glow'.


For the rose vine I actually cut this chipboard in half at the centre.
I inked it all with gold but only applied the foil to a few of the leaves and a flower,
leaning into the shabby chic look a bit.


And of course I couldn't just leave that other half of the rose chipboard behind!
So I knocked up this 'Thinking of You' card to include it on.


These simple template stencils are still my favourite way of making cards.


Step cards are so fast and easy with this combination...

1) Make card from stencil
2) Stick Papers on panels
3) Add a chipboard title
4) add a chipboard embellishment.

Too easy! 


I couldnt resist a little bling here either and after I inked the chipboard title a pale blue 
I also added some Crystalina Kindy Glitz to the letters.

I left the chipboard rose natuaral though ( see it does happen some times 😜).


And thats it from me this month.
Thanks for popping over for a look xo 


Cheers from Kelly-ann


Tuesday, October 26, 2021

Best Day Ever - A moment in time

Good morning all This month I created a layout using the left over of this clock chipboard piece which was perfect to showcase this moment in time when my hubby surprised me with our puppy, Teddy (Theodore).
I painted the top background in white paint and the hands and lace work on top in gold. The background was just simply covered in paper. I added some lace around the edge to highlight the round edge
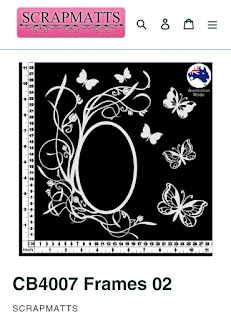
The butterflies were left over from Frames 02, and I have embossed them with Speckled Egg Distress Glaze and layered them to give soe depth.
I finished off with the "Best Day Ever" title which was inked with both a pale pink and an aqua ink.
As always, I have added lots of fussy cut flowers to my page usig different heights of foam tape to give dimension. Thanks for spending time with me again this month Heather

Sunday, October 17, 2021

Cherish Your Tribe -Kim


Hello...hello!

Kim here with you today to share with you a layout created using beautiful papers, and awesome Scrapmatts goodies!

My layout features my daughter, Samantha with her tribe of special people on her wedding day. Three of her dearest friends from school and her two sisters.

Love this photo, taken by her very talented photographer on the day!


Let me show you the layout...

[Cherish Your Tribe]


I have used this awesome layered stencil to create background texture. 
Then adding layers of lace and fussy cut elements to create height and dimension.


Instead of just using the lace as it is purchased, I decided to cut away some of the flower elements and stick those on my project. The remaining piece I trimmed a little and also added this to my layout.


Scrapmatts Products Used
{click on the images to be taken to the Scrapmatts online store}


I hope you have enjoyed looking at my project as much as I enjoyed making it?

Scrapmatts has an amazing range of products suitable for a huge range of applications, Scrapbooking, Cardmaking, Art Journaling and more!
 
Be sure to pop back here, to the Scrapmatts blog real soon as the design team post often!

Until next time & thanks for stopping by


Friday, October 15, 2021

October creating with Lizzy

 Hell there! How is your October going? I hope things are well with you..

Today I am sharing with you my layout I have created with some wonderful Scrapmatts products.

I have a few of the lovely Arch Window Frames in my stash and I wanted to use them in a different way on my page.. They make great frames around photos but I felt like cutting them up and placing on my page as features.

As I usually do I started by adding some interest to the back ground with stencils, one with texture paste and the other with an ink pad and dauber.


I cut one frame in half and I left one frame whole.


I kept a bit of a butterfly theme happening with these chipboard butterflies that I colored with glitter gel pens, adding different layers of color until I was happy with the rustic look.


I colored the feathers the same way with different glitter gel pens to give a multi-colored look. and placed them over some fussy cut feathers.

and my layout.

Remember to smile everyday.


I hope I have inspired you to look at your Chipboard and see if there is some way you can use them in a different way.  We are only limited by our imagination...  and that is where the Design Team inspiration comes along.. make sure you pop by again to see what else we have been creating!

The Scrapmatts products I have used on my layout..

ST9040 Butterflies Stencil  


ST5048 Lattice Stencil 


CB6038 Arch Window Frame 01


CB1222Feathers 02


CB1252 Scrap Words 35 


CB4012 Frames 02 (Butterflies)


Thanks for coming by, I hope you have a creative day.. For all your Scrapmatts products you can pop over to the Scrapmatts Online Store HERE!!!

Until next time, 

Happy Scrapmatting..

Sunday, October 10, 2021

Loving These Moments - By Crece T

Hey everyone, Crece here with you today to share a layout I have been working on.

Loving These Moments

I love one of the latest releases from Mintay - Apple Season, and just had to create a layout to share.

Here are some Close Ups...

I love using the Scrapmatts Titles. They are so simple and come in a great variety of words.
I have used some Ranger Embossing powder in Red Cinnabar to cover the chipboard.


I find using the String Circles set a Great way to frame subjects in photos.
I have also embossed this with Ranger Embossing powder in Red Cinnabar.


CB5139 String Circles 03


Thanks for stopping by, make sure you come on back and check out the rest of the design teams creations this month.

Hope you have a fantastic crafty week

Crece
XXX


Thursday, October 7, 2021

The best of friends

 Well here we are, a lot of you are still trapped in the nightmare that is Covid-19 and the ensuing lockdown but thankfully for us here in Orange we are out, still having cases so you never know what it is around the corner. Hopefully you have managed to get some creativity happening and on that note I hope that I can inspire you with my latest pages, using the, as always, gorgeous Scrapmatts products.

The pages I have done for this month are of myself with my gorgeous scrappy friends, Kim Ewins and Rachael Funnell, two of the most talented and beautiful people I am blessed to be able to call friends. Sometimes we get together for just a day and will go for lunch and then a roam around some of the lovely parks we have here. These pics were taken in the pride of our town, well that is what I think, Cook Park, it is a whole city block with a beautiful begonia house, duck pond, aviary, sunken rose garden and lots of other things to enjoy.


On this page I used one of my favorite stencils which I inked through and then extended it to give a lovely flow on the page, some corrugated cardboard, and the small wildflowers frame and some cut little scrap words.

PRODUCTS USED


This second page is again at Cook Park in the beautiful fernery which has a stunning water fountain. Again I used a stencil to add some more black elements to the paper to compliment what was already there, plus the fantastic brick wall stencil which was perfect for the background.

From the Wildflowers pack I cut the largest frame to make it fit around both of the pics, it is a bit dauting when you see how large it is but this way you can make it work for your advantage. Adding a nice green ink helped to make it all tie in together with some more scrap words and leaf pieces.


PRODUCTS USED


Well that is all from me for this month, I hope that wherever you are, you are keeping safe and trying to get through these troubling times. There is nothing like some retail and scrapping therapy to help with that so make sure you check out the awesome products on the Scrapmatts site.

Until next month
Hugs and love to all
Annette xx