Well, this is it folks... we have entered the magical month of December where all things bright and beautiful get their time in the spotlight! So crack out the Kindy Glitz, bring out the bling and get ready to make magic happen on those layouts, cards and projects...
For some festive inspiration this month I've been playing with some of my older Christmas papers and enjoying jazzing them up with some of the beautiful Scrapmatts stencils ...

The hero's of this page are these gorgeous star stencils... I hit them with some green ink and then used some Crystalina Kindy Glitz on a few special stars to highlight them on the page.


Next I've used some of the gorgeous Christmas words
and trees from this beautiful set ...


I inked each piece first and then put
Crystalina Kindy Glitz over them all.

Of course there are some little extra add-ons
from these other chipboard sets as well:


... and of course this divine reindeer - that I painted white and then promptly drowned in Crystalina Kind Glitz (again)😜


I love being able to use papers from my stash and am a firm believer that a set of coordinating scrpmatt stencils can bring any piece of paper back to life! ⭐
-------------------------------------------
Also this month I'm sharing a project I created for a very special purpose - this Christmas box is designed especially for storing and protecting my very special Christmas ornaments. Every member of the family has one - engraved with their names etc, but up until now I just wrap them in tissues and store in a ziplock bag in the Christmas tree box - this year I noticed they had been wedged in there poorly and the bag was broken and tarnish had started to creap in.
NO!!!!!!
So I made up this recycled box to pop them all in that will seal in its own larger ziplock bag!! Most importantly though it looks awesome and is a beautiful addition to our Christmas traditions 💚

So I started with this discarded box that my daughter
tossed out after opening. It has a hidden maganetic
clasp on the side which I just loved!


I started by covering all the panels on the box with this red spotty paper:

And then the decorating began...

Using Gold Kindy Glitz and gold surface stickers


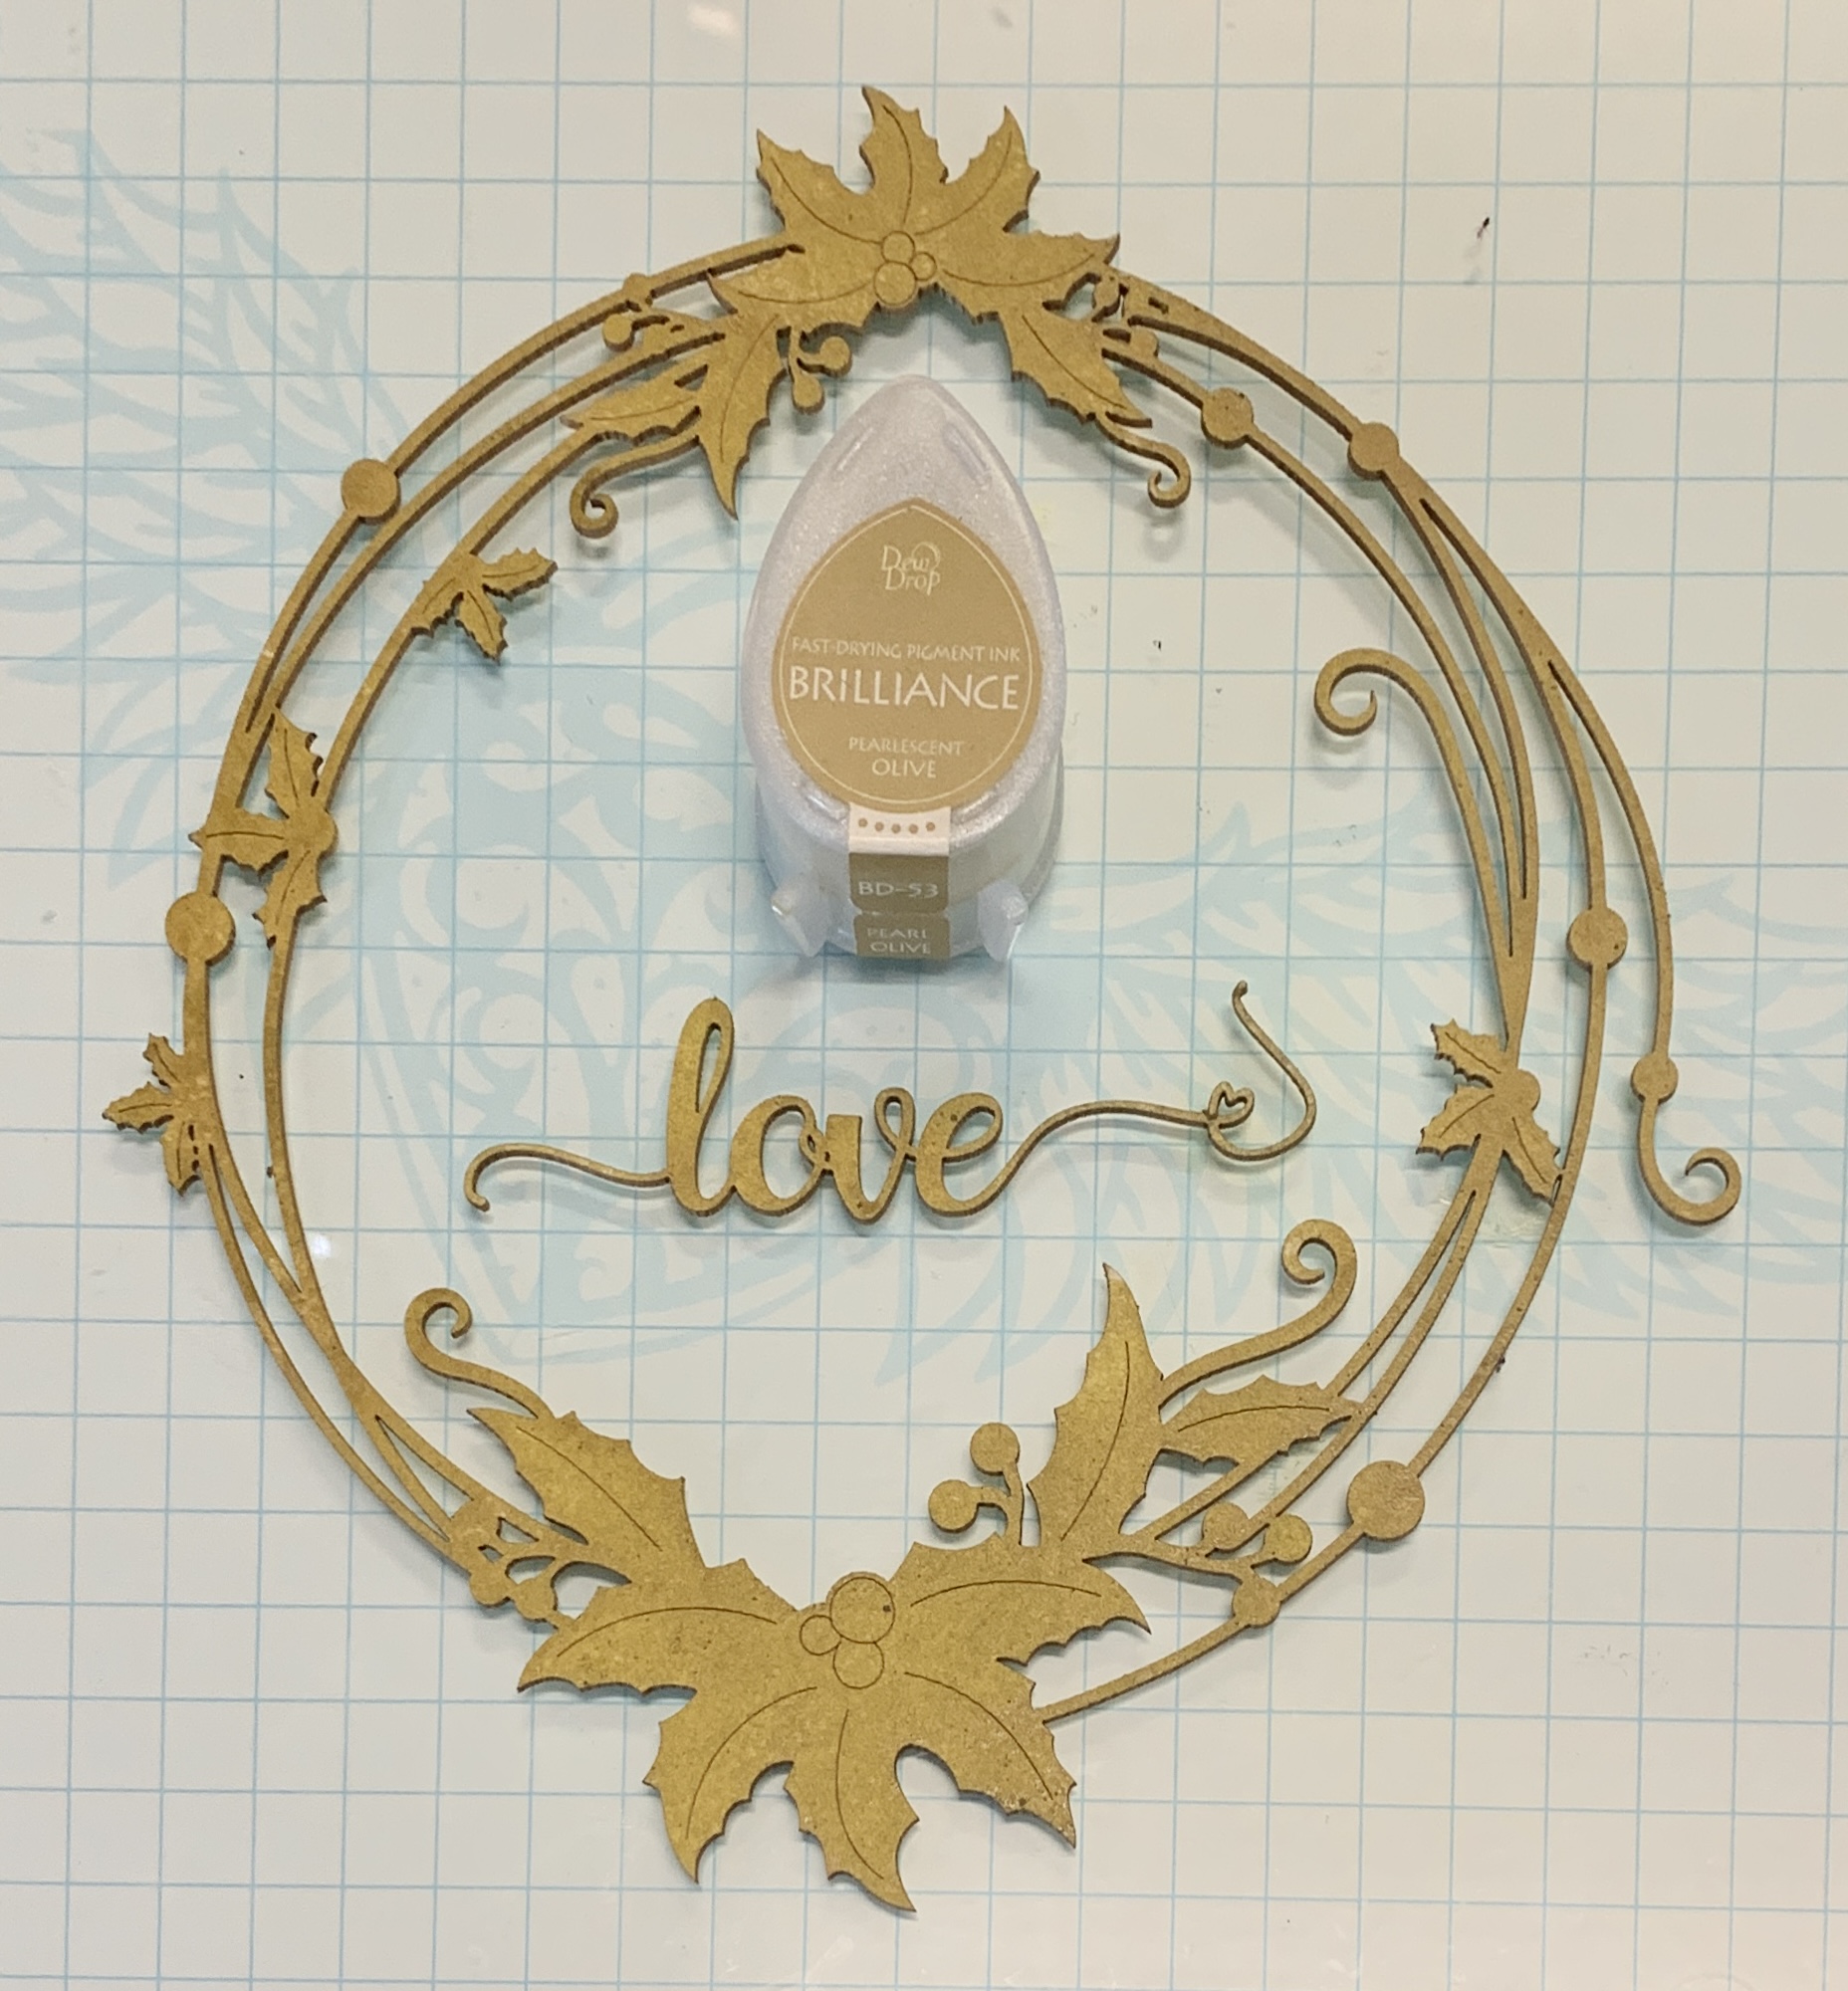
Next I grabbed the smaller circle from this beautiful
Holly String Circles pack and added some colour to it ...
and more Gold Kindy Glitz.

To make the hanging centre piece I had to get a bit more creative.

I started by taking one of these small string circle words and trimming out the word in the centre...


Next I grabbed this gorgeous sheet of santas from the Scrapmatts 'Montage Creatins Assorted Santas'paper.

and used the string circle as a template to
size the perfect Santa image...
 .
. 
After choosing just the right one, I used a circle punch to get the sizing as close to the string circle as I could.
Then I just needed one of these chain chipboard strips
to 'hang' it from.

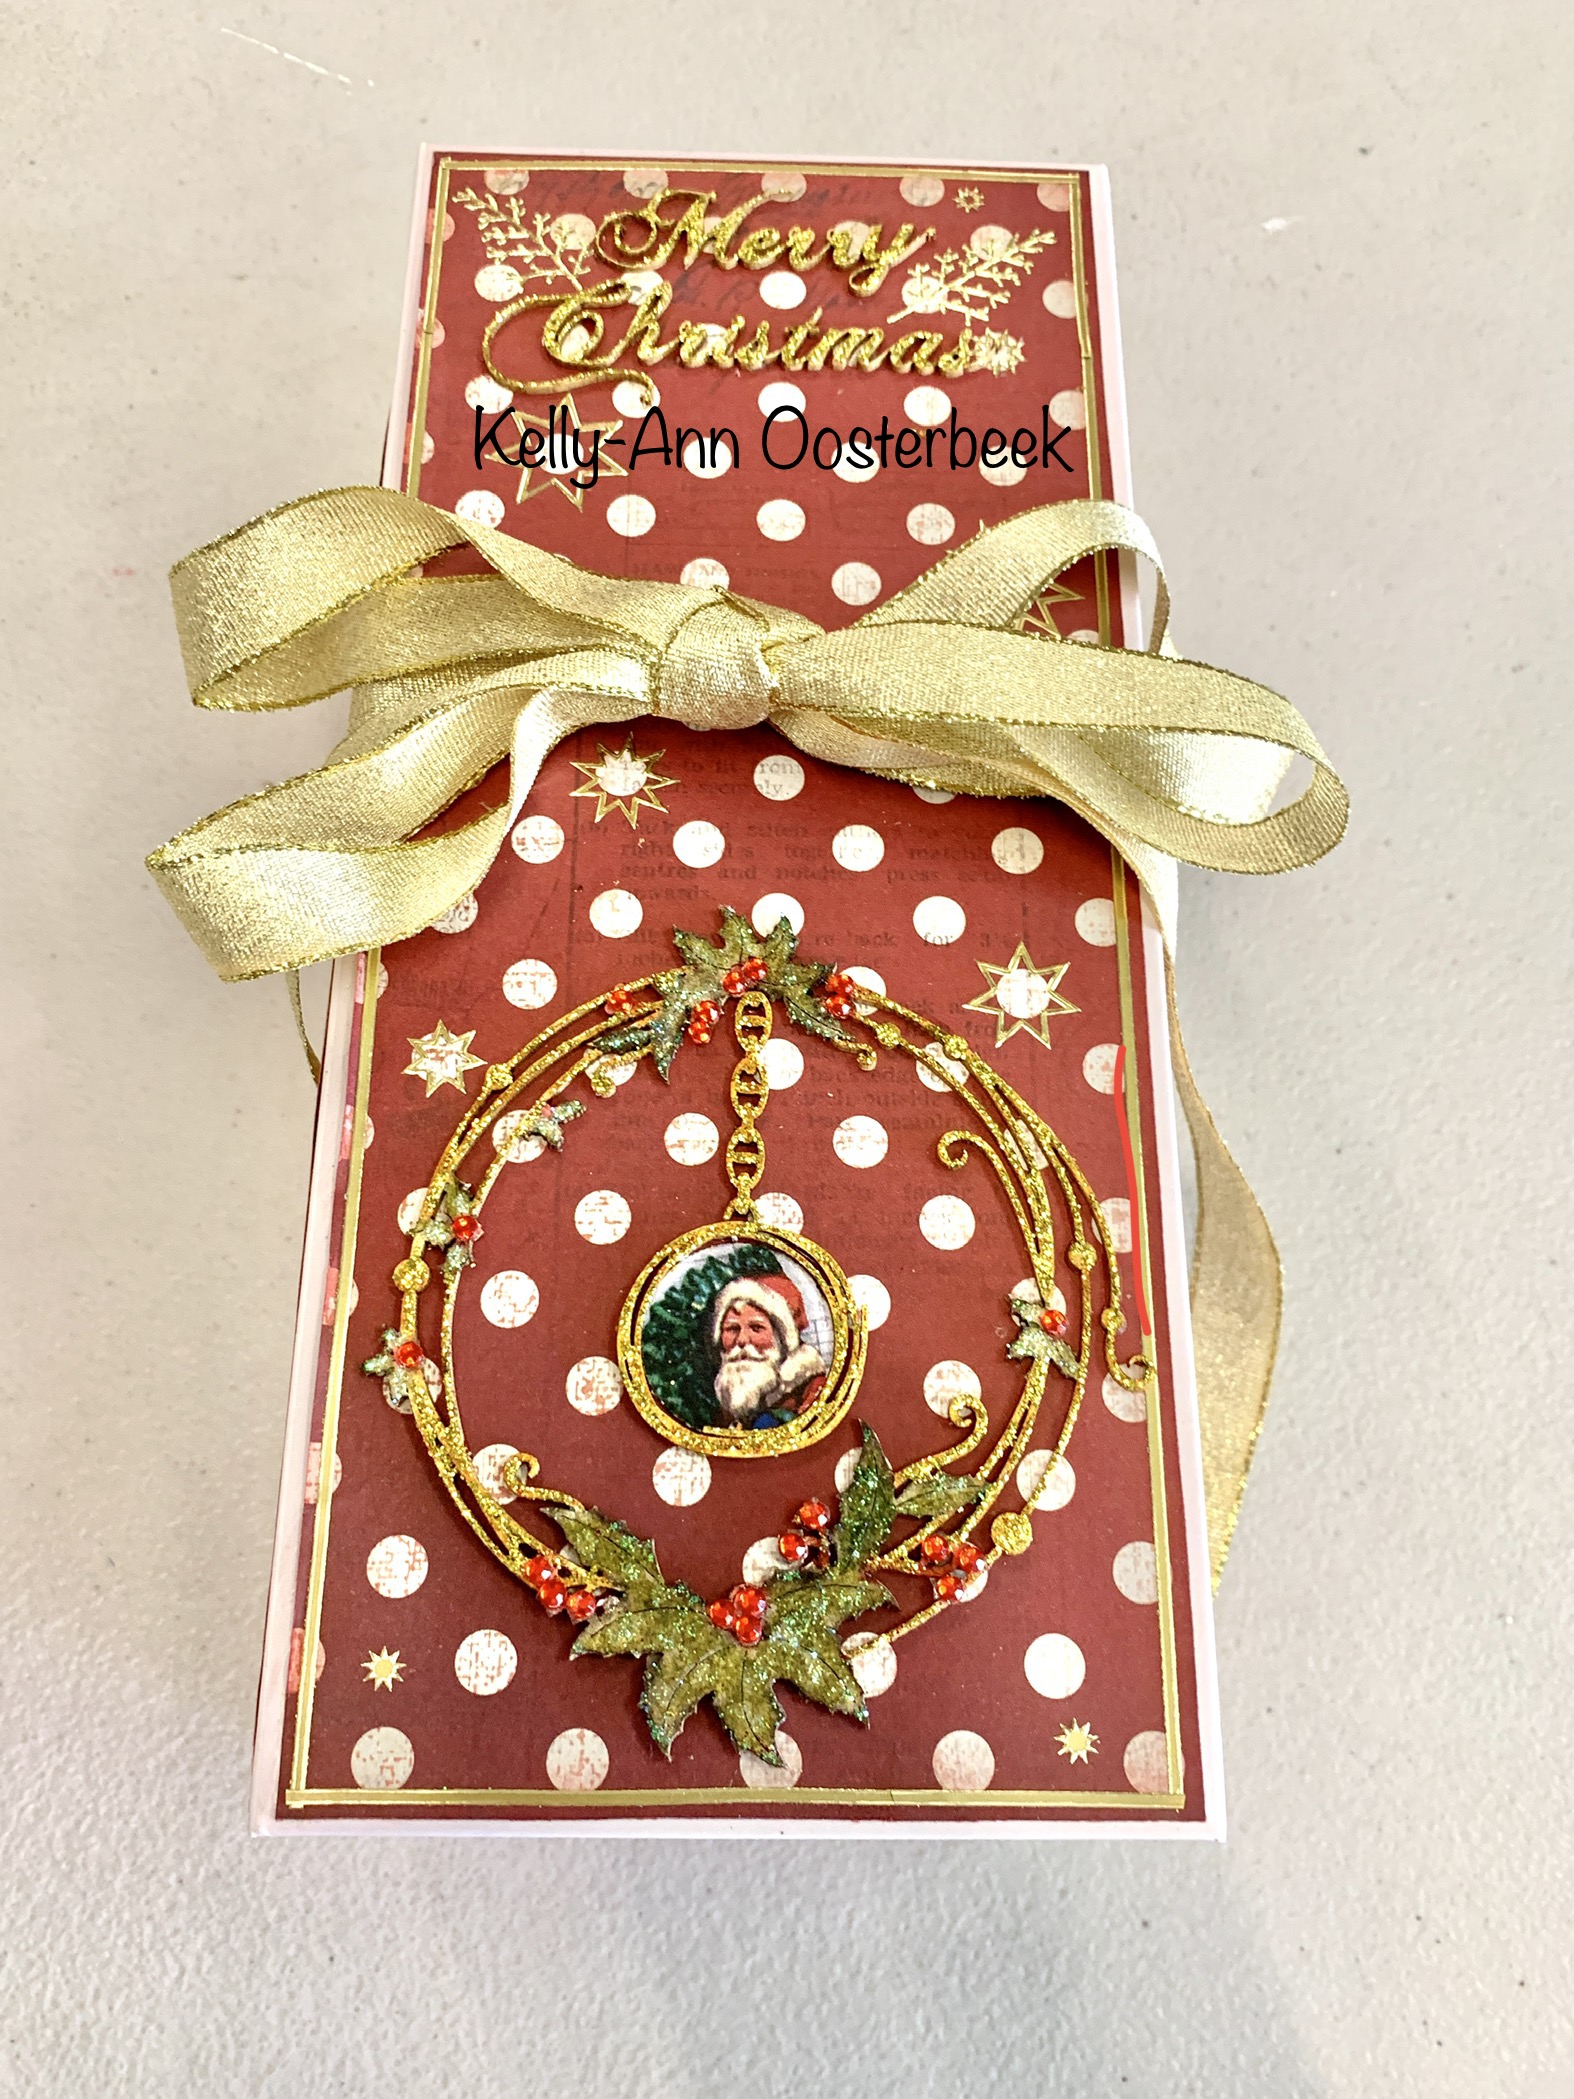
And just to make the side where the hidden magnetic catch is look a bit more special I inked some of these hinges with Gold and added them to the side of the box as well:


And now my recycled box is all already to keep my precisious ornaments safe for the year ahead - once we are finished with them this Christmas of course! lol
Thanks for popping by for a look - I hope you have been inspired to create some special Christmas projects of your own.
Have a bright and beautiful Christmas my friends

Cheers from Kel xo