Wednesday, December 29, 2021

Last of the Christmas Creations 🎄

December has been a glorious month for Christmas creations and today I'm sharing the last of mine...

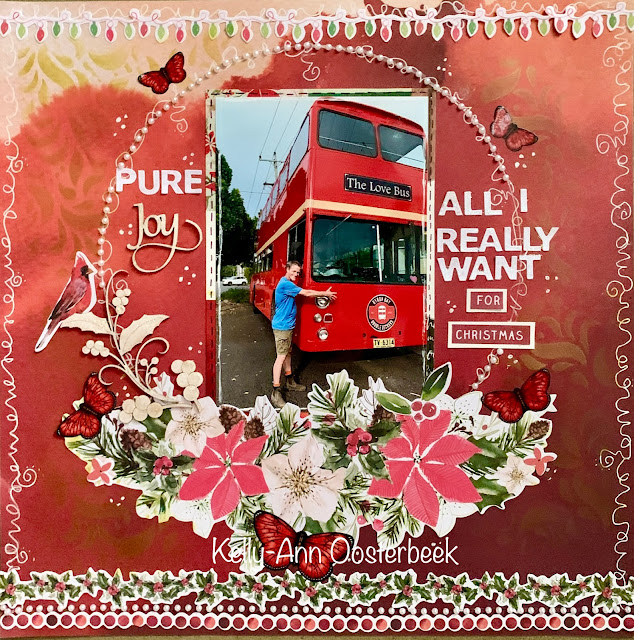
Firstly a layout... a fun one chronicling my husbands fondness for big, red, double decker busses and his consistent requests for one when asked what he wants for Christmas lol 😂


All I did to spice up the chipboards on this layout was add some 
Crystalina Kindy Glitz as the off white colour suited the page just as it came.


But I did use some subtle gold ink and this beautiful stencil to add some action to the background of the page. The gold ink glimmers in the light as you look at it from different angles which is an effect I love 💛


Next I turned my attention to this gorgeous Christmas tree shaker ornament. 


This versatile project can be used as a stand alone ornament or even as a special embellishment on a page or card ... it's super easy to put together and can be adapted easily to suit your own design and colour scheme. 

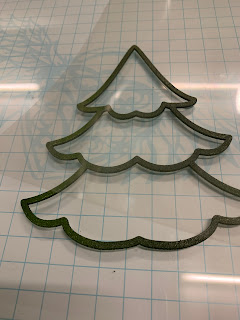
I started by spray painting the different tree layers with a dark and light green colours...


After this I placed a plastic sheet over one of the layers and traced it using a sharpie.

The plastic I used was an old over head projector page, but any slightly thick sheet of plastic will do the job - often the backing sheets on clear stamps can be good for this purpose also.


Then I simply assembled the pieces ... gluing the two side frames to the base... after that I filled the tree segments with fine green glitter, coarse silver glitter and some colour beads to create the shaker content.


To finish the shaker I glued down the plastic sheet I cut out under the final layer of the tree frame.

Then I used some glitter gel pens to colour the embellishments that came with the ornament and added these to the outside of the shaker to finish it all off... too easy! 


After this I put together a home made gift tag for a special present. 
I did this by heat embossing some chipboard words - a very simple yet effective technique for creating lush, reflective surfaces on chipboard...


I actually used a $15 crepe maker I picked up on sale at the supermarket for the heating process. 


First you cover the chipboard with embossing ink then dust it all over with embossing powder or crystals, then place on the crepe maker with a sheet of baking paper and allow that to simply melt to an even finish on the surface of the letters... then attach the finished product to your tag.


Next I moved onto creating what I hoped would be some vintage-like ornaments. 

Scrapmatts have these fabulously thick chipboards that are again perfect for  stand alone ornaments or stunning 3D add-ons for cards or scrapbook pages...

I used embossing crystals to cover the surface of these generous chipboards and the same melting process as I did for the tag words.


So to create the vintage look I needed the melting embossing crystals to be a bit rough ... I started with a vintage gold and scatted other colours into this 


This turned out to be a very easy and simple way to create a beautiful 
vintage finish on chipboard ornaments. 


And thats Christmas done and dusted for another year.
I hope you had a wonderful time celebrating with family both near and far. 

May 2022 be a very beautiful and blessed year for you all.


Cheers from Kel xo


Monday, December 27, 2021

Family Memories

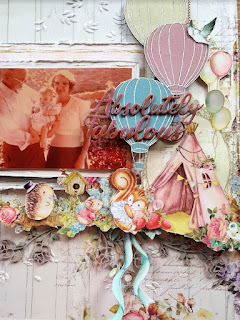
Good morning This month, even though it's still December I decided to not do a Christmas project, but instead found these super cute papers that were perfect for this photo of me with my grandparents.
I started by adding some texture paste with a stencil in the background, then added lots of layers of fussy cut paper pieces, of course.
I then inked the CB6050 Hot Air Balloons 02 with Distress Oxide inks, and did a little highlighting pen work with a white gel pen. The title, Absolutely Fabulous CT100, was also inked with Distress Oxide inks and finished with a layer of glossy accents.
The flowers, CB1202 Roses 02, were inked with a combination of a dusty green oxide ink and a pink oxide ink.
Thankyou for spending time with me again this month. I hope that you have all had a very Merry Christmas, and that you have a safe and happy new year. Heather

Thursday, December 23, 2021

December Creating

 Hi everyone,

Wow, what a busy and strange time we are in at the moment.  Haven't been that organised with my post, but this month I have finally made it on my day!!!

I had all intentions of creating a Christmas layout about how strange things were last Christmas in Sydney with Covid, but just didn't get there. This year is proving just as unsettled.

On top of all normal stuff leading up to Christmas, we have also renovated our bathrooms and laundry.  Things have been topsy turvey in our household for the last few weeks, but the mess was worth it. We love our new modern bathrooms.

Seeing as I didn't get to create a new layout, I have used one from earlier in the year.  I haven't posted it before as it is of me.  Like most others, doing layouts of ourselves, it not usually high on the list.  Again this is a photo from my husbands 60th birthday lunch earlier in the year.  By now you have seen the whole family!

I had lots of fun creating this layout using my favourite things - mixed media, flowers and Scrapmatts chipboards.


ST5058 Doily

CT095 Life is Good


CB6117 Assorted Words 30


CB6118 Boho 01


CB1115 Leaves 01


I wish everyone a fabulous Christmas.  Enjoy time with your family and friend, stay Covid safe.  I am looking forward to a rest and lots of time to do some creating.

Fingers crossed that 2022 will be a more settled year.

Happy Creating

Lisette 😃


Friday, December 17, 2021

Christmas Creating with Kim


Hello!

Kim here with you to share some Christmas creations, using some of the fabulous new 

Shaker Ornaments!

With these new designs you can use them as ornaments or you can add them to the front of cards.

Now, I chose to make them as ornaments.

Here let me show you...

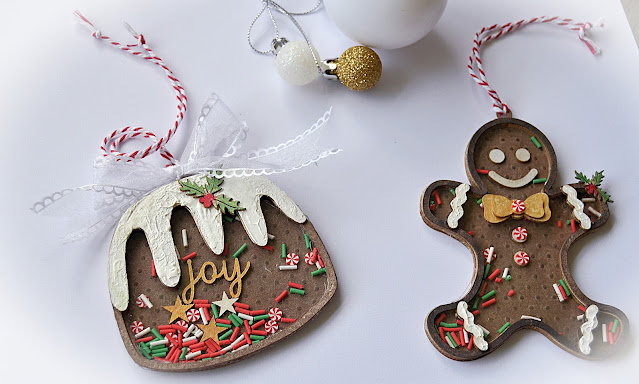
To create the textured base of the Gingerbread Man I placed the base in an embossing folder and ran it through a cuttlebug machine. 
Then inked the main body pieces. Next I assembled, adding in the inside elements. For the white icing pieces I used texture paste.

I also used the same technique with this super cute plum pudding.

For the 3rd Shaker Ornament I wanted to do something a little different, so I covered the base section with paper, except for the lower section of the bell. I then painted the other sections and elements using some gold paint. Also adding micro beads and ribbon to add a touch of softness.


Scrapmatts Products Used

Shaker Ornament Gingerbread Man


Shaker Ornament Plum Pudding


Shaker Ornament Bell


Holly 03


These shaker ornaments come with everything you need to create your shaker project, including the acetate!

I do hope you have enjoyed looking over my creations?
I will be back soon to share a few more Christmas creations.
Thanks for stopping by
See you soon