
December has been a glorious month for Christmas creations and today I'm sharing the last of mine...
Firstly a layout... a fun one chronicling my husbands fondness for big, red, double decker busses and his consistent requests for one when asked what he wants for Christmas lol 😂
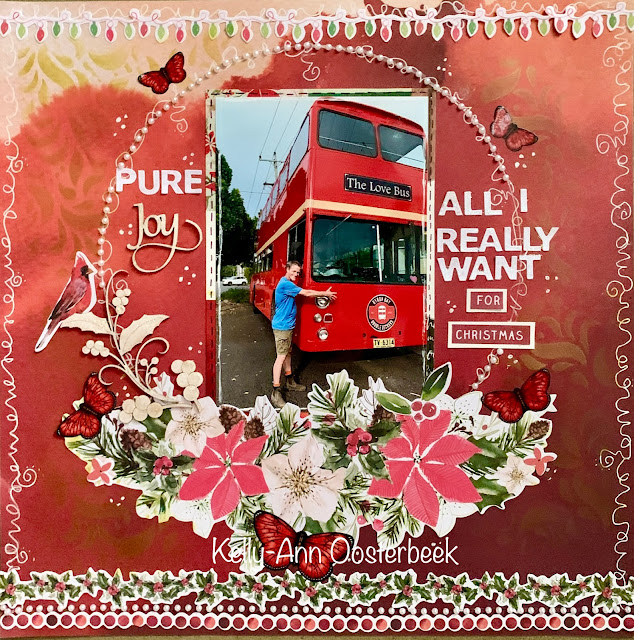
All I did to spice up the chipboards on this layout was add some
Crystalina Kindy Glitz as the off white colour suited the page just as it came.


Next I turned my attention to this gorgeous Christmas tree shaker ornament.


I started by spray painting the different tree layers with a dark and light green colours...

After this I placed a plastic sheet over one of the layers and traced it using a sharpie.
The plastic I used was an old over head projector page, but any slightly thick sheet of plastic will do the job - often the backing sheets on clear stamps can be good for this purpose also.
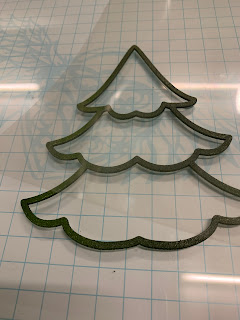

Then I simply assembled the pieces ... gluing the two side frames to the base... after that I filled the tree segments with fine green glitter, coarse silver glitter and some colour beads to create the shaker content.


To finish the shaker I glued down the plastic sheet I cut out under the final layer of the tree frame.
Then I used some glitter gel pens to colour the embellishments that came with the ornament and added these to the outside of the shaker to finish it all off... too easy!


After this I put together a home made gift tag for a special present.
I did this by heat embossing some chipboard words - a very simple yet effective technique for creating lush, reflective surfaces on chipboard...


I actually used a $15 crepe maker I picked up on sale at the supermarket for the heating process.


First you cover the chipboard with embossing ink then dust it all over with embossing powder or crystals, then place on the crepe maker with a sheet of baking paper and allow that to simply melt to an even finish on the surface of the letters... then attach the finished product to your tag.

Next I moved onto creating what I hoped would be some vintage-like ornaments.
Scrapmatts have these fabulously thick chipboards that are again perfect for stand alone ornaments or stunning 3D add-ons for cards or scrapbook pages...
I used embossing crystals to cover the surface of these generous chipboards and the same melting process as I did for the tag words.


So to create the vintage look I needed the melting embossing crystals to be a bit rough ... I started with a vintage gold and scatted other colours into this


This turned out to be a very easy and simple way to create a beautiful
vintage finish on chipboard ornaments.

And thats Christmas done and dusted for another year.
I hope you had a wonderful time celebrating with family both near and far.
May 2022 be a very beautiful and blessed year for you all.
Cheers from Kel xo
Beautiful festive creating Kelly-Ann..
ReplyDeleteThanks Lizzy 🙏💚
DeleteJust love all of these, awesomess
ReplyDeleteThanks Annette xo
Delete